
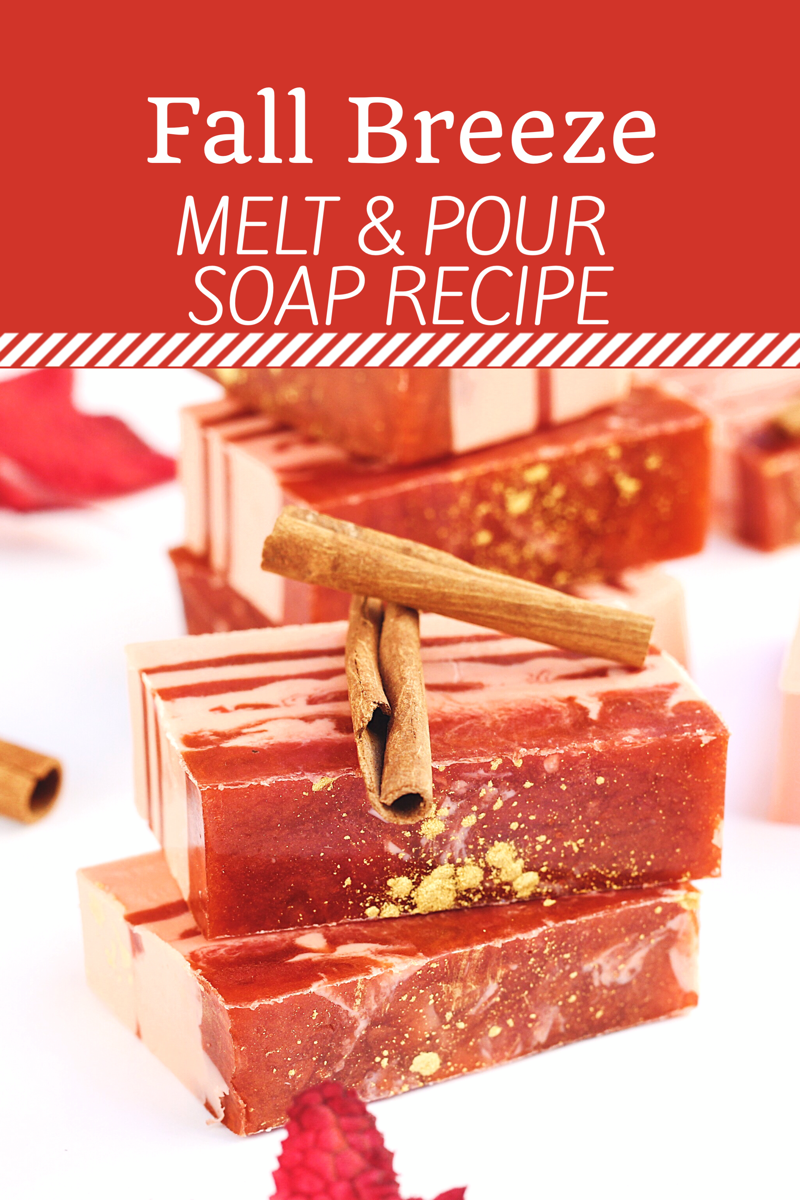
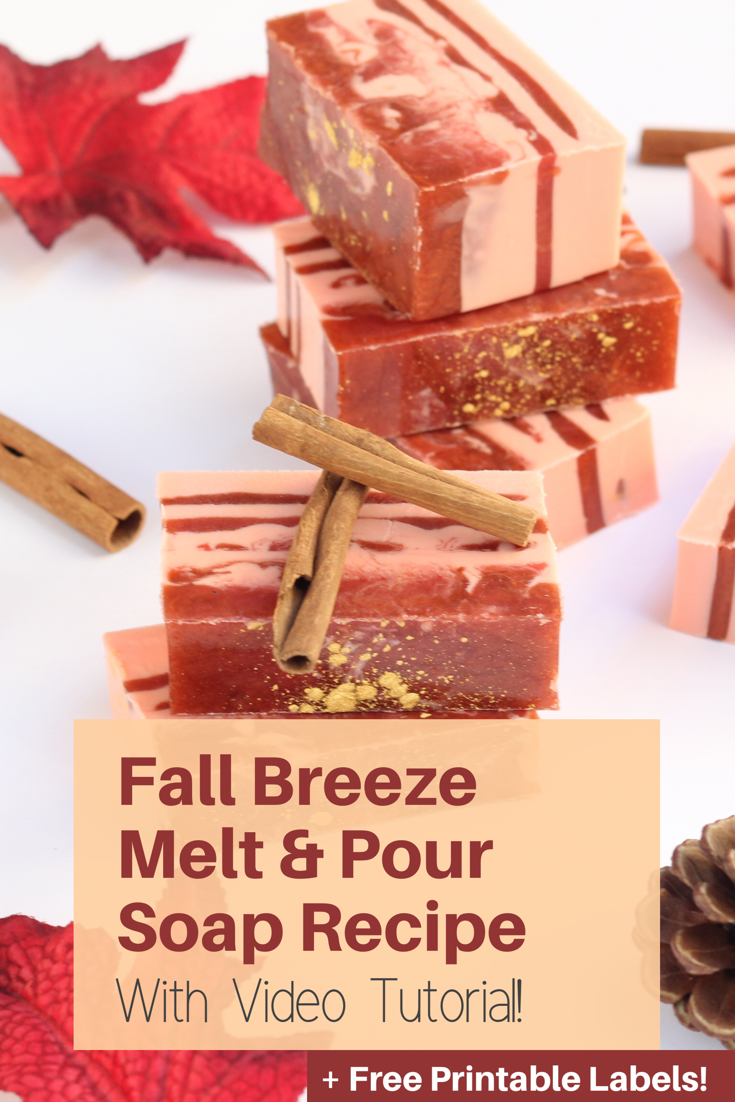
Fall Breeze Melt And Pour Soap Recipe + Video Tutorial
I’m back at it with another wonderful fall DIY recipe for you! So do you remember how I told you I am beginning to dive into bath bomb making!!?? Well I am finding that I love the bath niche altogether and am loving making body scrubs, bath oils, and soaps as well! Today I have for you my first ever soap recipe and some free printable labels of course!
When I first thought about making soap my initial thought was... well that sounds wayyyy too hard. I know a lot of you are thinking the same thing too, so let me just tell you that it IS NOT HARD!!! In fact this type of soap making, the melt and pour method, is so easy as compared to cold process soap making. It still leaves room for creativity in color and fragrance choice as well as some design aspects so for me, this is the best soap making method!
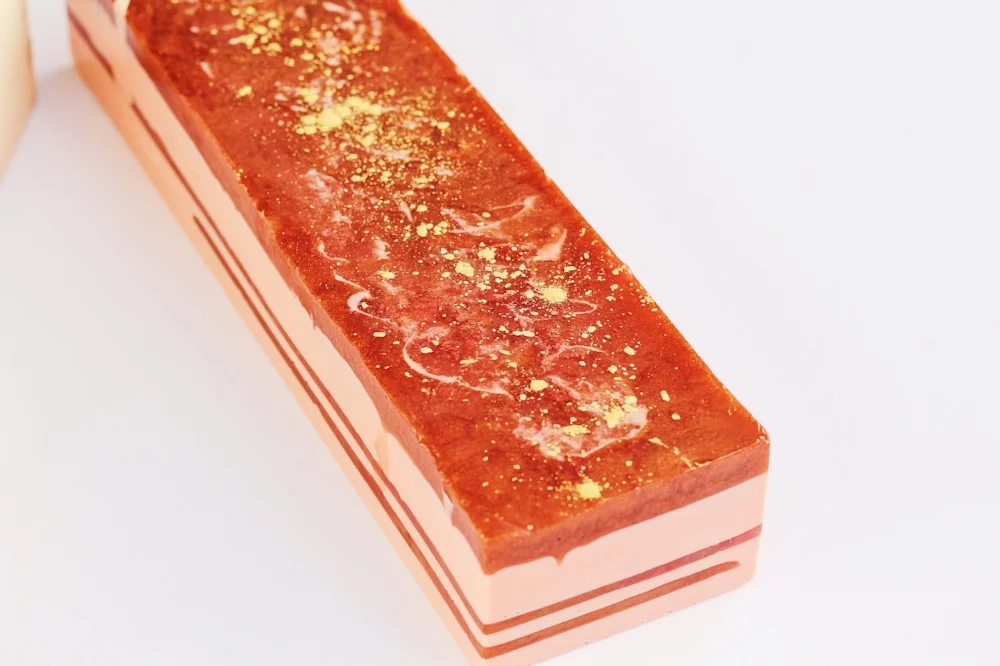
I again turned my kitchen into a little factory and got to work whipping up this fall melt and pour soap recipe. I started off thinking I wanted to make just a pumpkin soap because, well duh, I love pumpkin everything! But then I stopped to think about the other things I love about fall and I realized I would be remiss if I didn’t include smells of woodsy leaves and crisp air in the soap as well. Because I wanted to mix these scents together I decided on a dual layer/swirl method that would be sure to both meld the scents together and have them stand out individually all in the same bar!
If this is your first time making soap, let me start off by giving you a list of the ingredients and supplies you will need... now just like many new projects.... there is a lot of “up front cost items”, but if you intending to continue making soaps these will definitely all be well used in the long run. If you are interested in making this just a one time thing for a batch of gifts or a girls night, I would say buy the absolute bare minimum (soap, mold, and colorant) and add in whatever else you can while making due with what else you have at home.
Some links in this post are affiliate links which means I will receive a small commission if you purchase through the link provided. It is not necessary to shop through my links but if you do THANK YOU for your support of me and my blog! See Disclosure For More Details
Ingredients And Supplies Needed
28 oz. Oatmeal Soap Base
20 oz. Clear Soap Base
1/4 Tsp Burgundy Mica
1/4 Tsp Dark Orange Mica
1/4 Tsp Copper Mica
1/8 Tsp Gold Mica
90% or Higher Alcohol
Kitchen Knife
3-4 Measuring Funnel Pitchers (3.5 cup size)
Measuring Spoons
20 Drops Cinnamon Essential Oil
5 Drops Nutmeg Essential Oil
5 Drops Clove Essential Oil
1 Tsp Pumpkin Extract
1 Tsp Spellbound Woods Fragrance
10” Soap Loaf Mold (best to have a mold that comes with a hard outer box/shell to keep the silicone mold in its proper shape once liquid is added)
Spray Bottle (Filled With Alcohol)
Spoons For Mixing
Mini Spatula

As I have mentioned before, I have begun doing videos for my recipes because I personally feel they are helpful, so I would recommend you begin by watching the video here prior to reading through the step by step directions as it will be easier to understand, especially if you are new to soap making! And I fully intend to get better and better at my video making... I have a ways to go but you can’t always be perfect am I right!!???
Fall Breeze Melt And Pour Soap Recipe
Begin by mixing 1/4 Teaspoon of mica colorant with 1/2 teaspoon alcohol into a container, use a separate container for each of the three main colors: burgundy, orange, and copper
Dice soap into small cubes and place into pitchers. Place all oatmeal soap into one pitcher and divide the clear soap equally into two separate pitchers. You should now have three mixing spout containers, one with white oatmeal base and two with clear base.
Microwave the containers one at a time in 30 second bursts. Stir after each 30 seconds and continue this until all soap is melted uniformly.
Once all soap is melted, use your mini spatula to pour the mica colorant into the pitchers (remixing immediately prior to pouring to allow the mica to disperse again in the alcohol). You will want to mix the orange with the oatmeal soap pitcher and the burgundy with one clear pitcher and the copper with the remaining clear pitcher.
Using a separate spoon for each color, stir the soap and colorant together until all is evenly distributed.
Add 20 drops of Cinnamon EO, 5 drops of Nutmeg EO and 5 drops of Clove EO into your orange container and use your spoon to mix well.
Add 1 teaspoon Spellbound Woods fragrance oil to the burgundy container and mix well.
Add 1 teaspoon Pumpkin Extract to the copper container and mix well.
Now you are ready to make the soap! Be sure to determine the temperature of the soap bases prior to starting, initially you will want each container to be between 110-115 degrees for the layering process. If necessary, rewarm the soap or allow it to cool more, whichever may be necessary.
When your soap is at the right temperature, fill the bottom of your mold, approx one quarter inch with your orange soap. After pouring use your spray bottle filled with alcohol to spray any bubbles on the surface which helps eliminate bubbles and allows layers to stick together.
Wait 30 seconds to 1 minute and then pour a 1/4 inch layer of burgundy soap at the same temperature. Use your spray bottle filled with alcohol to remove any bubbles and wet surface.
Wait 30 seconds to 1 minute and repeat this same process with the copper soap. Be sure to pay attention to the temperature and rewarm as necessary. Spray surface with alcohol.
For the remainder you will now want your soap to be at a higher temperature - approximately 125 degrees to allow for the swirling to take place (lower temps will not allow the swirling and higher temps may muddle the colors). Reheat the soap as necessary in 10-20 second bursts. Once your soap is at this temperature pour a layer of orange soap and spray with alcohol as you have previously done.
At the higher temperature now pour your burgundy soap at varying heights and locations to create a type of swirl pattern. The higher temperature should allow the colors to mix together in a nice marble pattern. At this point you will no longer have distinct layers, but rather layers that swirl and blend together. Follow this pour right away with pouring the copper soap in the same swirling manner. Follow this immediately with pouring the orange soap in the same manner.
After all three colors have been poured in this swirling manner at higher temperature, you will now wait approximately 2-3 minutes for the soap and swirls to set. Now you will want to spray the surface and any bubbles with alcohol.
Repeat steps 13-15 as many times as necessary to use up all of your soap base. This may or may not fill up your mold completely but it should be majority filled.
Once you have used all of your soap base (or ran out of room in your mold), use your fingers to lightly sprinkle the gold mica across the top layer of soap for added decoration.
Allow the soap to sit undisturbed for 4-6 hours or even overnight so it can harden completely.
Once the soap has fully hardened, use a knife or soap cutter/scraper to cut your loaf into equal soap bars (1.5 to 2 inches in thickness seems to be standard).
Wrap in plastic wrap or use packaging of your choice, best to cover the soap as much as possible to prevent condensation from forming or loss of fragrance.
I truly hope you all enjoy this recipe, it was really fun for me to make and a true labor of love! Please share using the social media buttons at the bottom of this page if you enjoyed it, and as always commend or email me any questions!
Want free printable labels, check them out here!
Want to see some of my other bath recipes? Check out my Orange Sherbet Fizz Bath Bombs!