

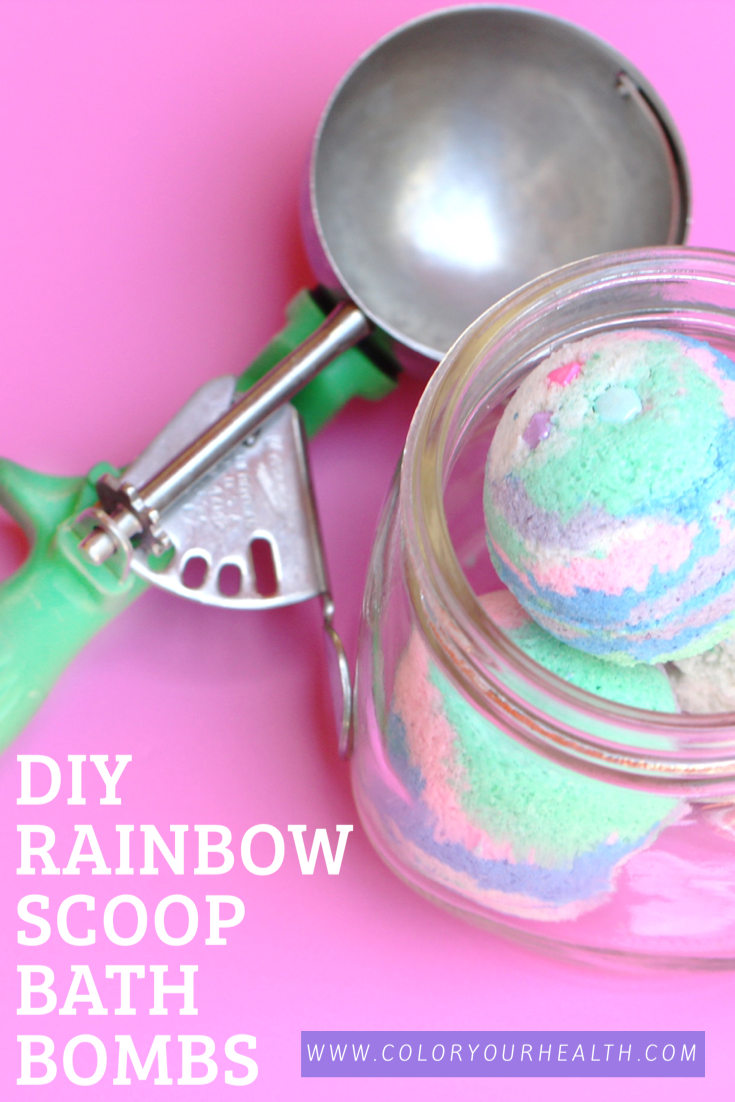
A Fun DIY For Kids: Rainbow Scoop Bath Bomb Tutorial
Coming up with fun activities over this quarantine period has actually been something that I have quite enjoyed! Like their mama, my girls especially like making special things that they can use and they currently have a special affinity right now for bath bombs. Like me, they are very fond of color as well so I set out to make a bath bomb full of color! I initially had my mind set on making a unicorn themed bath bomb but my girls surprisingly seem too thrilled about that one. I then suggested rainbow ice cream scoops and they liked that idea much better since it’s only their favorite dessert!
The girls were able and eager to help with all of the steps, with the exception of packing the actual molds, I did this myself so as to avoid any “oops” moments! Even with having parental help and supervision, the girls were very proud of themselves to have made something so cool. The best part of course is the finished product and all the extra fun it adds to bath time! And for those that love to get more bang for their buck, this one recipe can be turned into 3 different projects that can be found below at the end of this post!
Some links in this post are affiliate links which means I will receive a small commission if you purchase through the link provided. It is not necessary to shop through my links but if you do THANK YOU for your support of me and my blog! See Disclosure For More Details
Ingredients and Supplies Needed
The amounts listed here are enough for 4 large size bath bombs or 8 medium sized, or a mixture of both
1 Cup of Baking Soda
½ Cup of Citric Acid
½ Cup of Arrowroot Powder
6 Tbsp Epsom Salt
3 Tbsp Grapeseed or Coconut Oil
½ Teaspoon of Polysorbate 80
15 Drops Orange Essential Oil
15 Drops Geranium Essential Oil
15 Drops Patchouli Essential Oil
½ Tsp Mica Of Each Of The Following Colors: Pearl Shimmer, Lime, Neon Pink, Light Blue, Lavender
Optional: Sprinkles
1 Large Mixing Bowl
5 Small Bowls
1 Spoon and 1 Fork
5 Small Spoons
Measuring Cups And Spoons
Rainbow Scoop Bath Bomb Tutorial
WARNING: Although these bath bombs look very similar to ice cream, they are not edible and you should monitor your children during the creation and use of these bath bombs!
1. Measure out baking soda, citric acid, arrowroot powder, and Epsom salt into your large mixing bowl. Using a fork, sift and stir all ingredients together in order to combine them well.
2. Next, add in the grapeseed/coconut oil, the polysorbate 80, and your essential oils. Using your fork, mash and stir all ingredients together until everything is well combined. You want to have a consistency at this point similar to wet sand. It should hold shape when you hold it in your hand and squeeze it together, but then crumble away easily. The mixture should not be too mushy or wet. If your mixture is too dry you can add in water via a spray bottle, 1 spray at a time. The water will activate the citric acid and start fizzing, so be sure to mix right away after each spray to stop the fizzing.
3. Once you have reached the desired consistency, dive the mixture evenly into 5 bowls.
4. Add your mica powder into each bowl, a different color for each bowl. Stir to combine the mica in each bowl and evenly distribute the color.
5. You are now ready to begin packing your bath bomb molds. Begin by taking one half of your chosen size mold, if you are using sprinkles you will want to first add a small amount at the bottom of your mold. Now, add a small amount of one color into your mold with your spoon, lightly packing it down into place.
6. Continue adding spoonfuls in different colors and lightly packing down until your half mold is filled (but not overfilled).
7. Repeat the same process with the other half of your mold, very slightly overfilling this half.
8. Now combine the two halves putting light pressure on the mold to squeeze the contents together.
9. After 1 minute, carefully remove one half of the mold to ensure that the bath bomb remains intact and does not separate at the mid seam. The mold should easily come off of the bath bomb. Once you are successful moving one half of the mold, place it back on the bath bomb, turn the bath bomb over, and repeat this process on the other side.
10. If your bath bomb crumbles or separates at this stage you can simply scoop up all the material and pack it into the mold to make a new one. Your colors will no longer be “layered” and more so, mixed but that’s okay, it will still achieve the look we are going for!
11. You will not leave the bath bombs to dry for at least 12, but preferably 24 hours. I typically leave the top half of the mold off when I am letting my bath bombs dry as I feel it helps them dry quicker.
Using the same initial mixture, I have also created Shooting Star Bath Bombs and Mermaid Water Fizz! You can also check out my Sherbet Bath Bomb Tutorial if you want more ice cream inspired bath treats!