

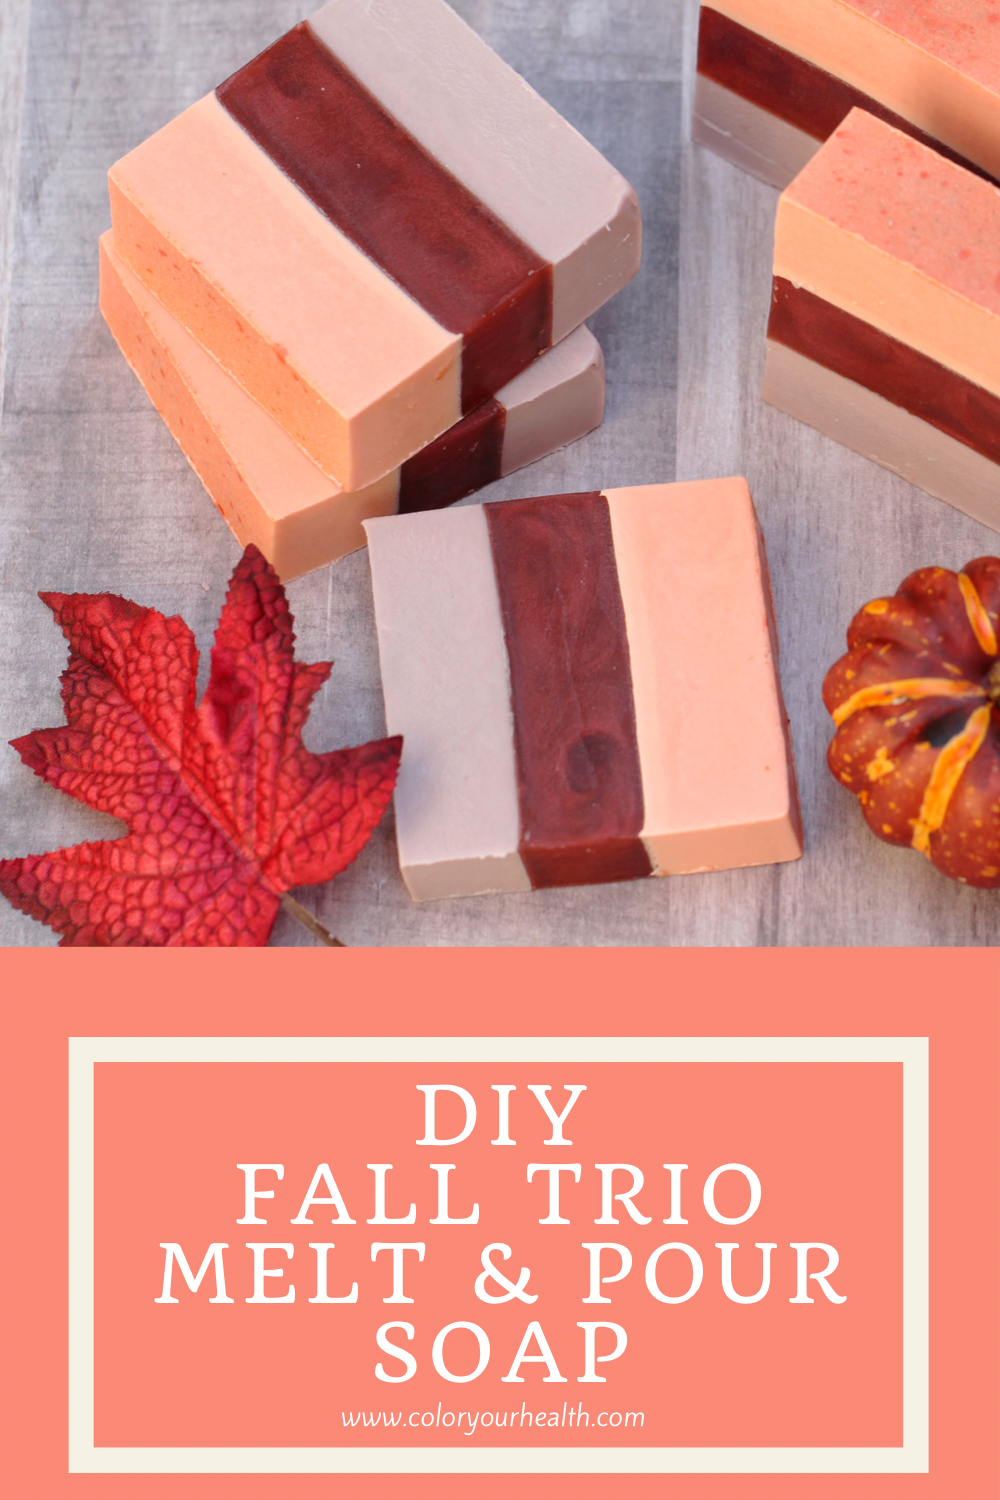
Fall Trio: A Beautiful And Luxurious Melt And Pour Autumn Soap
As my blog name and photographs suggest, I am a lover of color through and through. While I am a huge fan of vivid colors, I always crave the fall months as a time to revel in all of the subdued yet rich colors of autumn. These beautiful colors were what sparked my inspiration for this fall melt and pour soap. These would make beautiful teacher or friend gifts and would also be great hostess gifts for Thanksgiving! And if you are not a pumpkin lover, worry not! While this soap does have some pumpkin notes, it is a blend of all the different scents of fall! I used blends from my favorite essential oil retailer which are currently sold out but I was able to create the blends myself as well so that I can tell you how to make your own! (Side Note: I did end up finding the blends on Amazon as well and the link is included in the Ingredients section below)
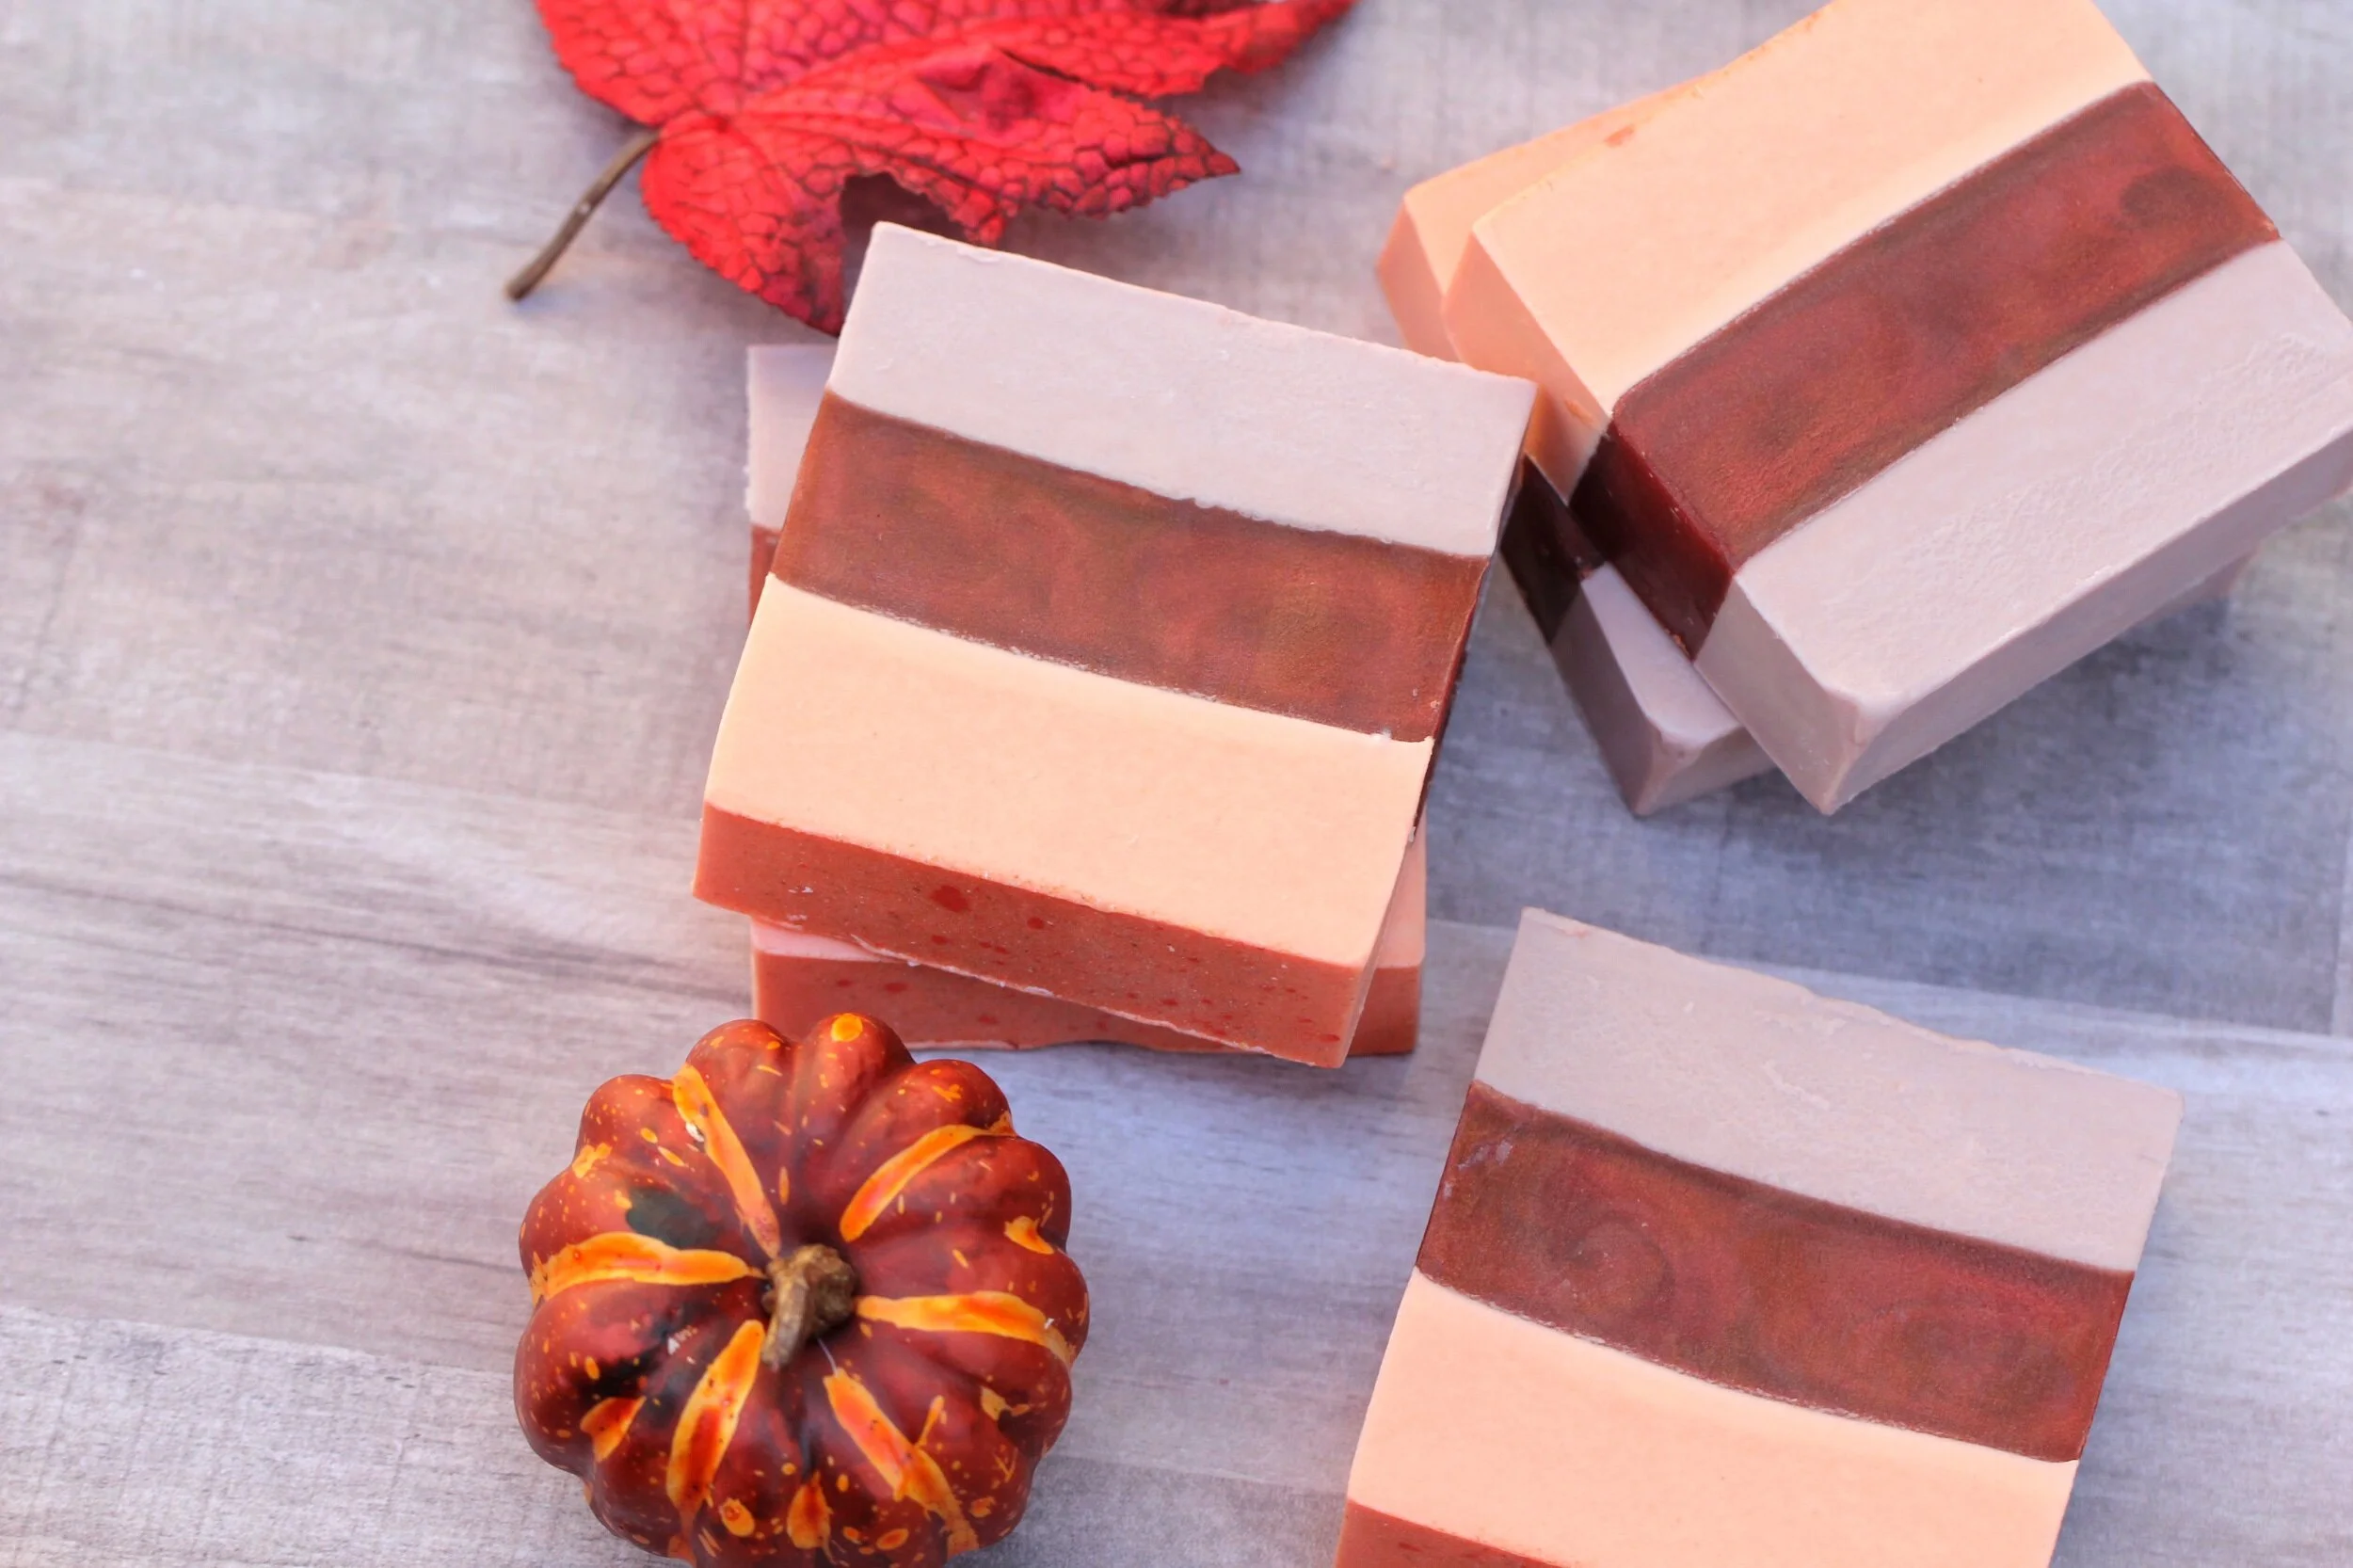
Not only did I combine gorgeous colors and delicious scents, but I also combined differing soap bases to leave the skin utterly soft and moisturized. Shea butter, hemp seed oil (or olive oil), and goat’s milk all provide a nourishing and moisturizing component to this amazing soap. Your senses will be lifted and your skin softened (and cleaned!!) every time you use this soap! So, if you love the breathtaking colors of autumn like I do, read on to see how to makes these beauties yourself!
Some links in this post are affiliate links which means I will receive a small commission if you purchase through the link provided. It is not necessary to shop through my links but if you do THANK YOU for your support of me and my blog! See Disclosure For More Details
Ingredients And Supplies Needed
1 Lb Shea Butter Melt And Pour Soap Base
1 Lb Hemp Seed, or Olive Oil Melt And Pour Soap Base
1 Lb Goat’s Milk Melt And Pour Soap Base
Alternatively, you can buy this set of melt and pour soap bases
Sunset Orange, Bronze, and Mulberry Mica Colorants
Knife
Cutting Board
Spoon
Essential Oils: Douglas Fir, Bergamot, Lavender, Juniper, Cinnamon, Orange, Nutmeg, Clove, Cedarwood, Frankincense (**These are the individual oils that make up the Plant Therapy blends as the blends themselves are sold out. Alternatively, the blends are still available through Amazon Fall Rain, Pumpkin Pie, Fireside Flannel )
Spray Bottle Containing 70-99% Alcohol
Fall Trio Melt And Pour Soap Recipe
Begin by dicing your Shea Butter soap base into 1-2 inch cubes. Once finished, place cubes into your microwaveable mixing container and melt in 30 second intervals until all is melted.
Add in 125 drops of “Fall Rain Blend” or the following combination of oils and stir well: 50 drops of Douglas Fir, 30 drops of Bergamot, 25 drops of Lavender, 20 drops of Juniper
Next, add in 1-2 Tsp of Sunset Orange (or your preference of orange color) into the melted soap and stir. As an option, you can leave small clumps of mica in your soap, this will allow the top layer of soap to have darker orange “flecks”.
After stirring, pour entire contents into the your soap loaf mold. This layer should take up approximately 1/3 of your mold. If there are any bubbles showing on the surface you can spray with your spray bottle of alcohol and the bubbles should disappear.
You will not repeat the dicing and melting as done in Step 1 with your Hemp Seed/Olive Oil/ or Clear soap base.
Once this next layer is melted you will add in 125 drops of the “Pumpkin Pie Blend” or the following combination of essential oils and stir well: 65 drops of Cinnamon, 25 drops of Orange, 15 drops of Nutmeg, 15 drops of Clove
Next, add in 1 Tsp of your Bronze mica color. As this is a more clear layer of soap base, your color will show much more vividly so you will not need to use quite as much mica for this layer. Stir together well.
Your first layer (orange layer), should now be showing signs of an initial set (this typically takes around 15-20. minutes in my experience). Prior to pouring your second (bronze) layer, you will want to make sure the second layer of melted soap is not too hot. Using your digital thermometer, check that the temperature of your melted soap is somewhere between 125-130 degrees. Another way to check is to touch and hold your hand on the outside of your soap container. You should be able to keep your hand here for several seconds, if it is so hot that it burns your hand right away then let it cool for a bit longer before pouring.
Once you have verified that your soap is not too hot, spray your orange layer with your alcohol spray to coat it well, this allows for a better adhering of the two layers of soap. Now, pour your melted bronze layer onto your orange layer. Again, if any bubbles appear, you can spray those away with your alcohol spray.
Your final layer will be melted just like the previous two layers. After cubing your goats milk base, melt in the microwave in 30 second intervals until all is melted. Mix thoroughly together.
Once all is melted, add in125 drops of “Fireside Flannel Blend” or the combination of the following essential oils and sir well: 40 drops of Cedarwood, 30 drops of Juniper, 20 drops of Douglas Fir, 20 drops of Orange, 15 drops of Frankincense
Now, add in 1-2 Tsp of Mulberry colored mica. Mix to incorporate all clumps of mica.
You will now again wait until the second layer (the bronze layer) has formed an initial set and your mulberry layer has cooled to between 125-130 degrees.
When your final melted layer is at the ideal temperature, spray your bronze layer with your alcohol spray and then pour your melted mulberry layer for your final layer. The soap should now come close to the top of your mold. Spritz your alcohol spray on any bubbles that have formed at the surface.
Wait 12-24 hours for your soap to harden fully. Gently remove the block of soap from the mold and slice your soap to your desired thickness. When slicing be sure to apply even pressure from straight above to avoid separation of the layers. This loaf should make approximately 8-10 individual soaps based on your preferred thickness.
Package your soap as desired, gift, use, and enjoy!
Want more fall soap recipes? Check out my Fall Breeze Soap Tutorial

